

Winter Sowing your seeds can start anytime from late December onward, in Canada and the United States. For more hardy perennials that require cold stratification, you can start them earliest. Starting more tender annuals can wait until a little later, into February, March, and even April in cooler areas.
You can winter sow your seeds at any time. They will germinate when the conditions are right for the plants.
Choosing Containers
You can use any container that will hold at least 3-4 inches of soil, and if it has enough headroom for the seedlings to grow up to 3″ in height. All containers should be translucent enough to let light through.
If you prefer, you could use transparent containers, such as totes, adding your seeds in seed trays, or small individual cups.
Preparing Containers
Make drainage holes in the bottom and remove caps from bottles or add holes in the lids of other containers. These holes allow moisture to enter and drain with the weather conditions.
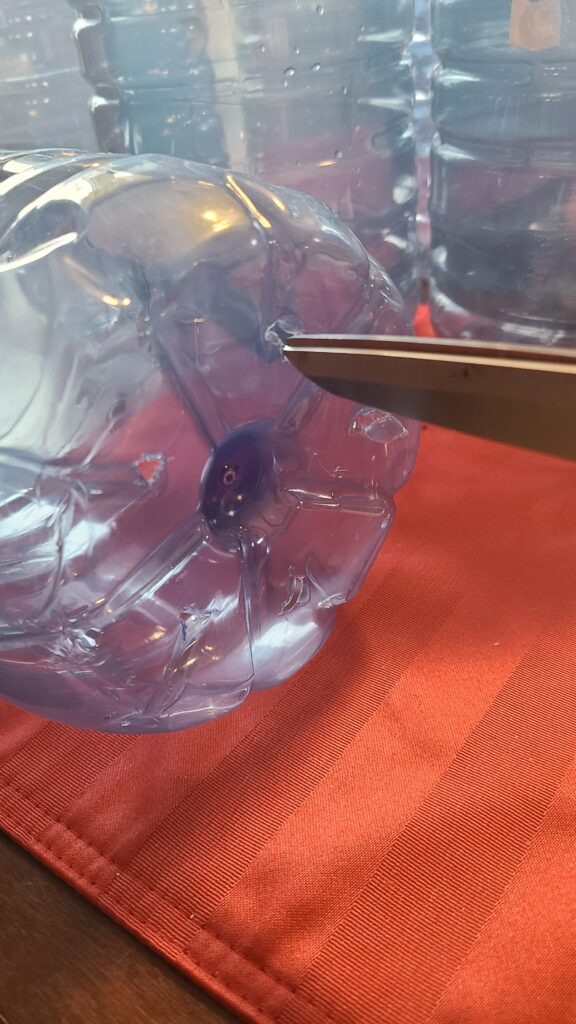
Cut the container around the middle leaving about 2″ uncut to create the “hinge”

Preparing Potting Soil (Not Seed Starting mix)
For starters, when winter sowing, you want to use a good potting mix, not a seed starting mix. Moisten your potting soil with water so it will clump when squeezed, but not drip water. You will want it to hold together when squeezed.
Sow Seeds Into Containers
Fill your chosen container with 3-4 inches of the moistened potting soil.
Sow your seeds, pressing small seeds into the top of the soil to make contact, with large seeds you can cover lightly.
Label & Seal Your Winter Sowing Containers
Label your containers with what you have planted. With a Sharpie, fading can occur, put a plant marker inside as backup, or use a garden marker (like this one).
To properly close the container, use duct tape and make ventilation holes only on the top. These holes should allow rain and snow to enter. If you are using jugs or pop bottles, you don’t need to make any additional holes. Simply remove the caps and leave them off your bottles, allowing rain and snow to enter.
Put Your Containers Outside
Move your containers outside as soon as you seed them. You can place them anywhere that receives adequate sunlight and rainfall or snowfall. Avoid placing them in shaded areas or under eaves. It’s important to ensure that your containers receive enough light and moisture for healthy growth. Therefore, please check them regularly for moisture. If they are not receiving sufficient rainfall or snow, you may need to add water to moisten the soil.
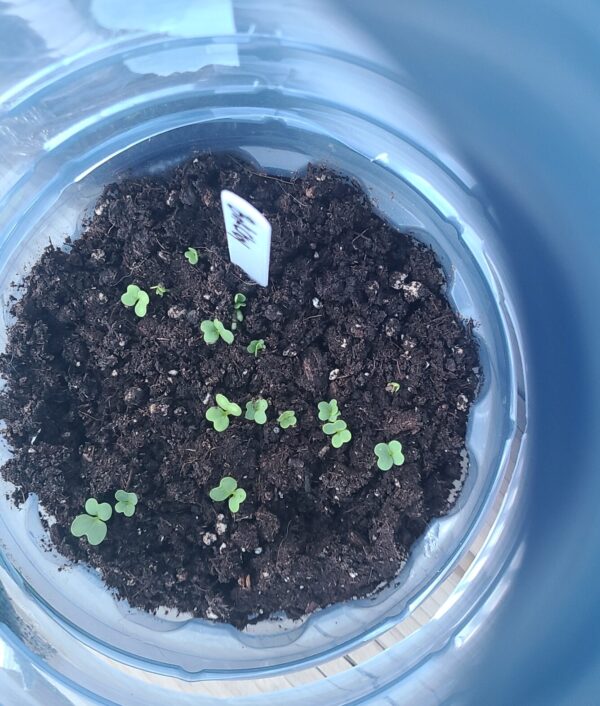
Watch Spring Germination
Once the seeds have germinated, you want to add more ventilation or move containers to a shadier location. You can also open the containers and re-close them at night while it’s still cold.
Winter sowing is a low-maintenance method with a high-germination rate. It can be relatively hands-off, but you must keep an eye on them as the weather warms in Spring. The seeds will germinate, each when the conditions are right for that seed.
Transplanting
Transplant your Winter sowed seedlings to your garden when you have 2 sets of real leaves or the seedlings are approximately 2″ in height. You can also pot them up if your beds are not ready. Either way, they need fresh soil and more nutrients to continue growing past the seedling stage.
Winter sowing is meant to be easy. Some things will work better or worse from year to year. Depending on how long your seeds were outside, what containers you use, the seeds you sow, and, of course, the weather.
Awesome guide to winter sowing – thanks!